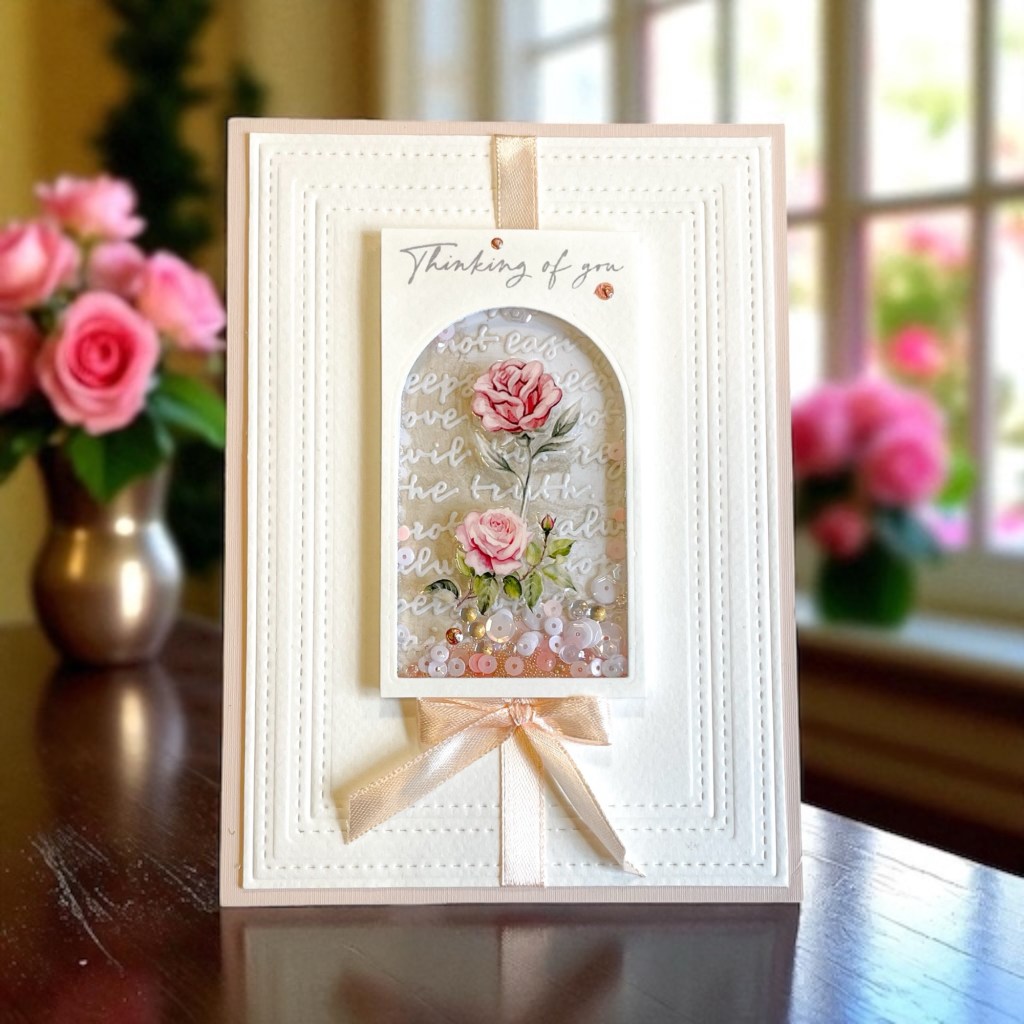
Thinking of you. You matter. I see you. While making this card, I thought of so many people to send it to, I needed to make many! People in need, old friends, past co-workers and the list goes on. I love the clean design of this card and the understated elegance. Sending happy thoughts to you all!
Inspiration
The inspiration for this card was two-fold. I was intrigued with a popular item called Rub-ons. My preference is Copic coloring or water color so I hadn’t thought much about using a ready-made product or how effective or enjoyable it would be. I do like to try something new however, so I purchased an inexpensive pack. Beautiful images but immediately noticed they were shiny, Ick! So I used one, threw it in a drawer and promptly forgot about it. Then during a recent live episode with Heidi at Simon Says Stamps and Tim Holtz, Tim did a tiny self-contained shaker element. (How-to under Creation below)
Shaker cards. You either love them or hate them. Can’t they be fussy? I do them sometimes and usually have to recover a few weeks before trying another 🙂 While trying this new genius way Tim showed, of course, I had a SHINY acetate window….Eureka! Perfect place for a shiny rub-on! And the creation was born.
Creation
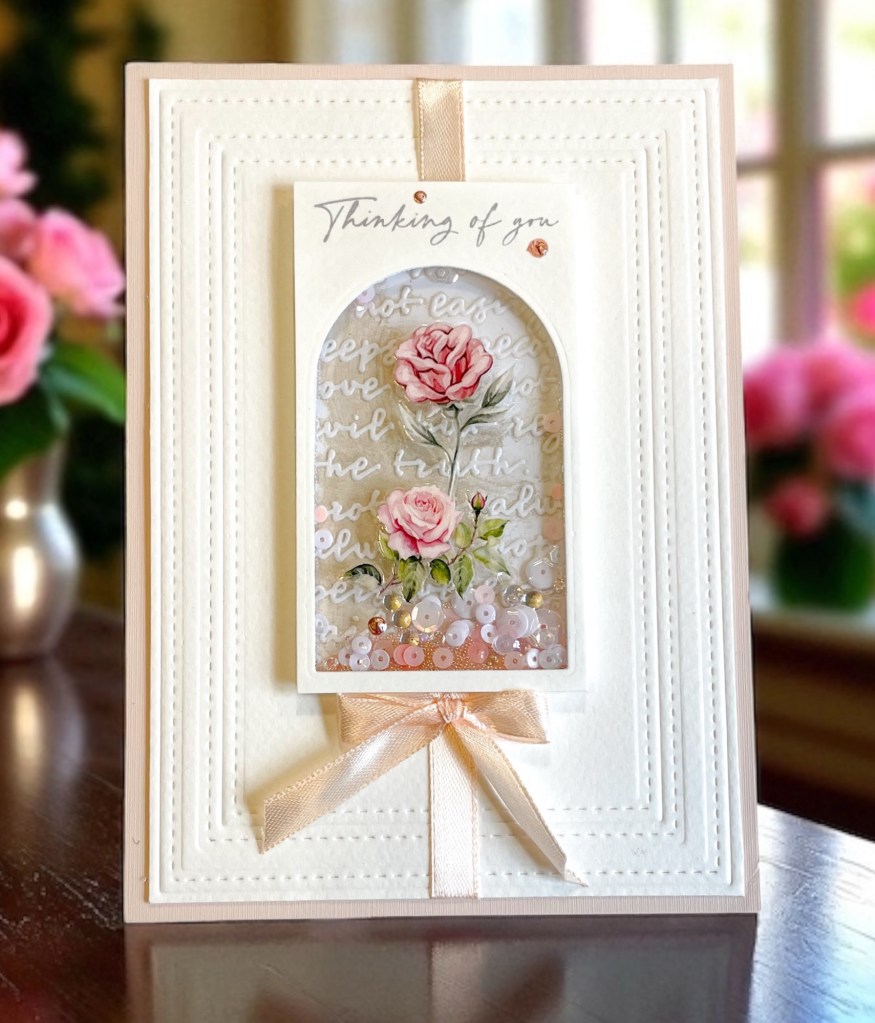
This is an A7 Card. Let’s make the main element!
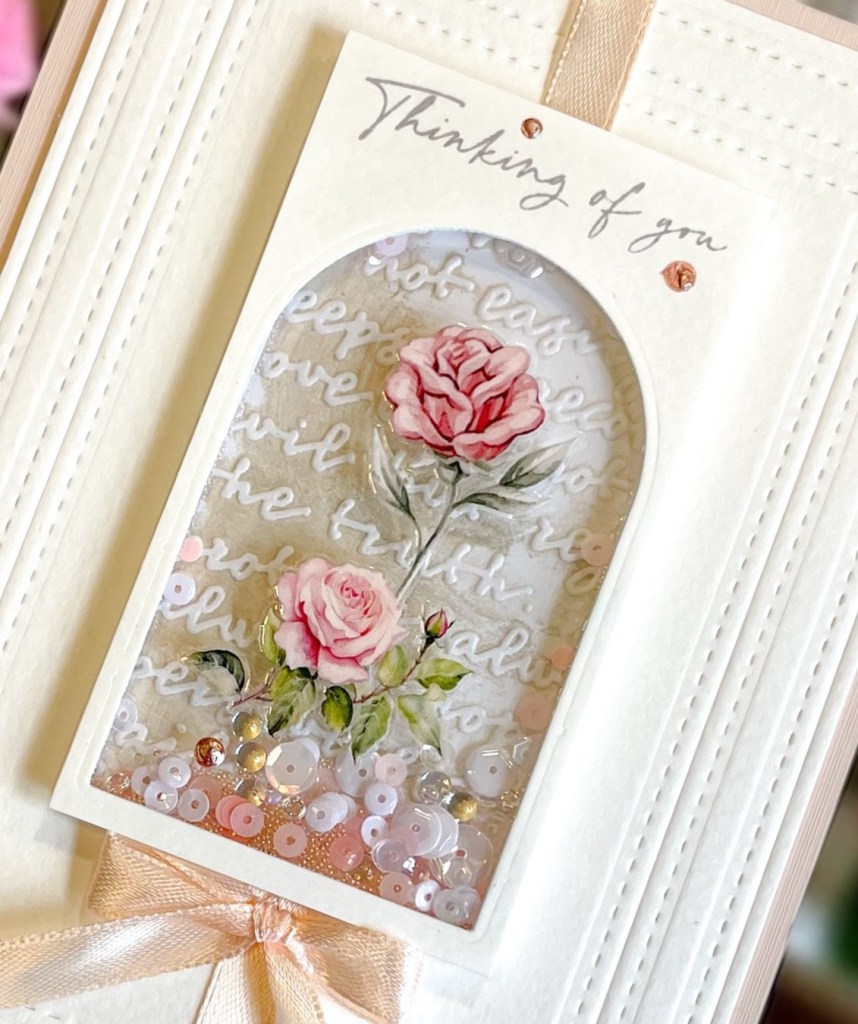
- Apply the rub-on to a piece of Acetate. I did several different ones on one sheet, spaced out, so I had options.
- Cut out 2 Rectangles from cream cardstock. I cut an arch frame out of this for the window and stamped the sentiment. I used a soft gray for the sentiment ink.
- Mount the “rub-on” acetate to the back of the stamped frame and glue the other panel behind that for dimension.
- Now here’s where the magic starts and things get different from the conventional shaker. We are going to encase this to make it an element vs a “shaker card”. Add thin foam strips to the back of the frame. You can use foam with glue or pre-made foam strips. I just made sure there were no gaps (to prevent shakers from escaping) and you couldn’t see it from the front.
- Add your shakers. I used a combination of very light and sparkly bits to make it ethereal.
- The twist: Don’t add your background image at this point. Cut a piece of acetate the size of your little panel and glue to the back of the shaker. You can glue this with glossy accents, not glue. It’s a strong hold, sticks quick and is completely invisible. Now you have a fully encased shaker where you can add a background glued behind it all and according to the card you’re making! Easy!
- For this card I embossed a background with a 1 Corinthians 13 embossing folder and distressed with Old Photo distressed ink. I mounted to the back of the shaker and carefully trimmed around it.
- Using an A7 card panel cut down by 1/4”, I embossed using nesting frames. (Use your embossing mat vs your cutting plate) I do this a lot with my dies. It really extends their usability.
- Finishing touches/assembly. I wrapped ribbon around the panel and secured with tape on the back. Using double sided adhesive strips, I mounted that to a card base. Mount the shaker with strong adhesive. Finished off with a tied bow and 3 dots of stickles. What do you think?
Hugs for Crafty Companies
Shout out to Heidi and Tim Holtz for great ideas!
Hugs all around…..Kathy


I’d love to hear from you! ❤️