How about a birthday hug? Everyone likes to receive birthday cards, but few send them anymore! I do send cards even if they’re late. In fact, one of my favorite stamps says “sent late to extend the celebration”. Whatever works right?
Jump down to Creation for How To
Inspiration
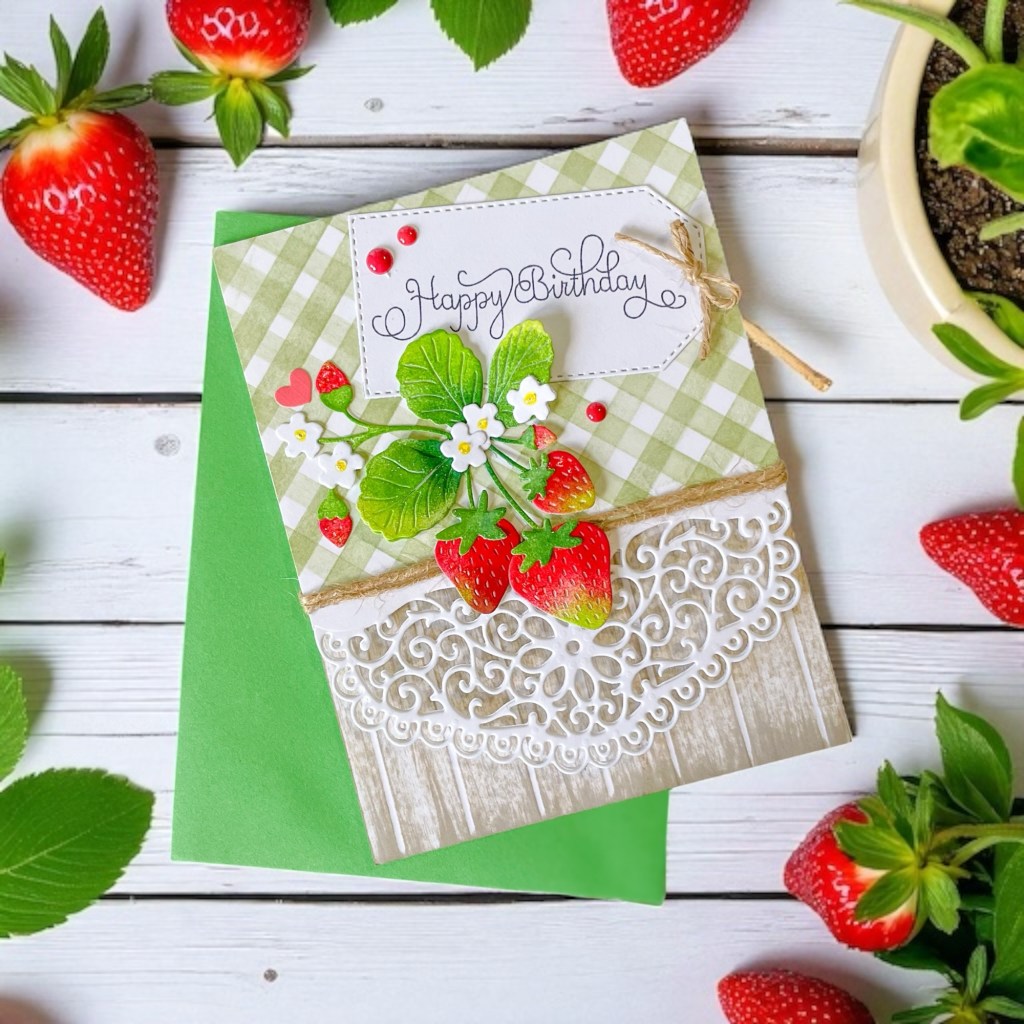
Strawberries remind me of summers many years ago when my children were still small. We had a strawberry patch in the back yard, so myself and two toddlers would venture out at sunrise (they were early risers) to pick a few strawberries for breakfast. Oh, those memories are sweet.  Anytime I can make a lacy die work in a design, I’m all in! Hope you enjoy this inspired birthday card for someone special.
Creation
This is an A2 top folding card, which is very rare for me to create. If I don’t create an A7 card then typically it is an A6 card (my new favorite). However, in this case, the A2 was perfect for the message.
- Starting with an A2 panel of 80 pound card stock I die cut the lace piece from the bottom of the panel. Do this twice and glue together.
- Masking off the lace area, I stenciled the gingham pattern on the top of the panel. I made the stencil with my Brother scan and cut as I didn’t have a stencil that was the right size. For this card I used Memento ink for all the blending. Bamboo Leaves was used here.
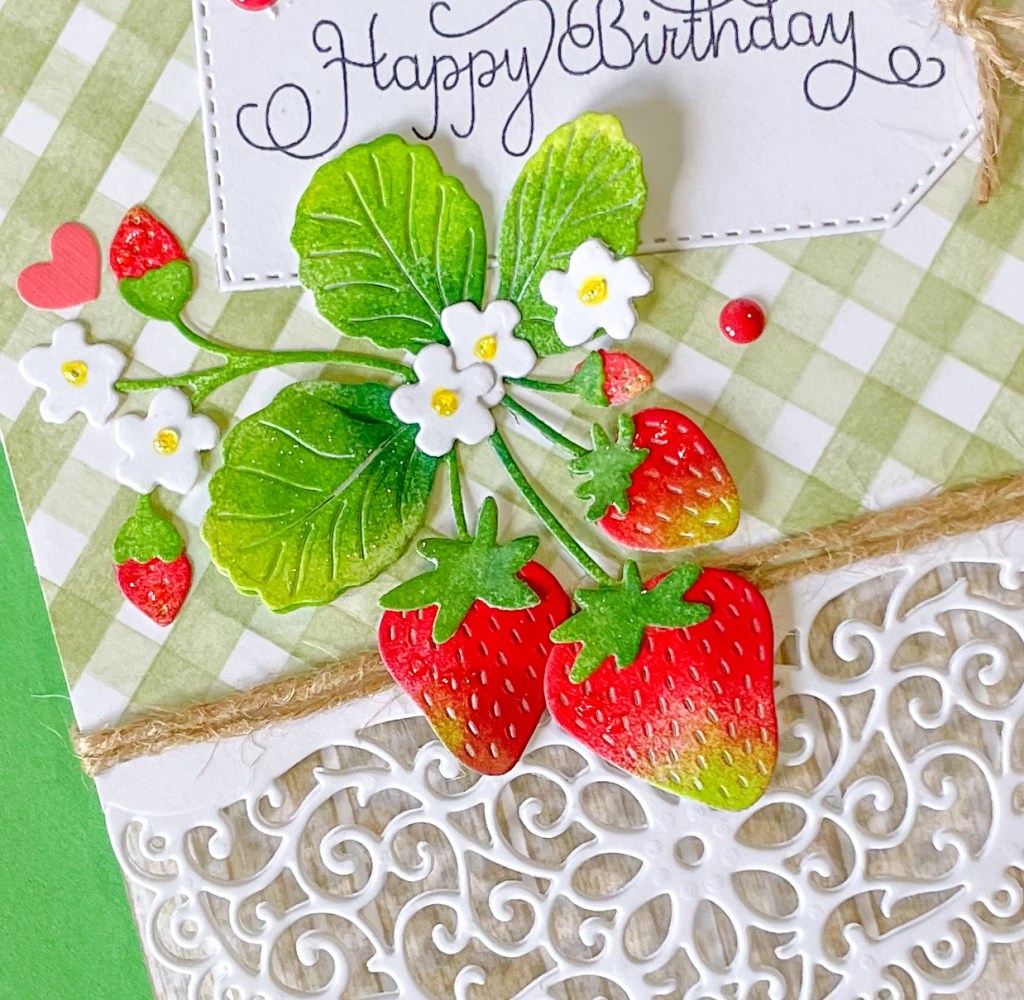
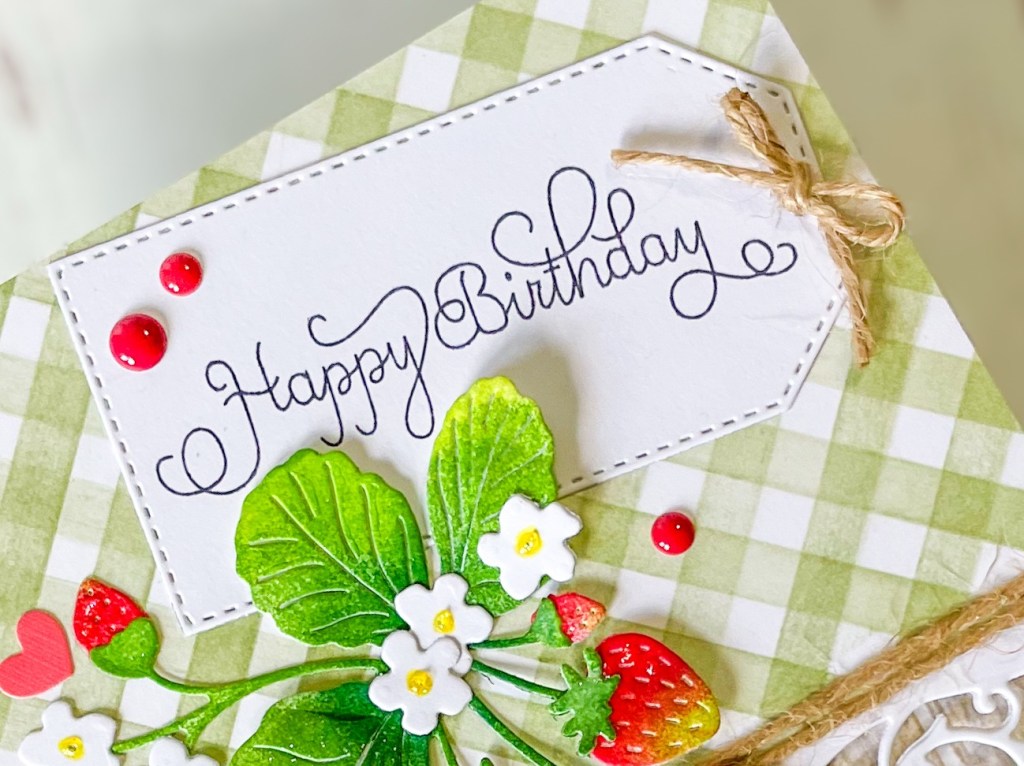
- Now for the fun part! I use these darling strawberries and flowers from The Greetery – Botanicuts. They were cut out on 110 pound white card stock then the ink blending was done on each piece. I did use a flower molding tool to create the dimensions on the strawberries . (Hint: when assembling use a tiny piece of foam under the strawberries so they will hold their shape in the mail)
- Now for the card base. I measured where to cut the front of the card, cutting where the top of the lace would fall. Then I scored another A2 panel every 1/4 inch and used a dragging technique with Distress Ink Vintage Photo to create the wood.
- Attach the Panel (Lace/Gingham) to the front of the card base. Trim the wood piece to just long enough to reach the Lace seam and attach to the inside card base. This will leave enough room for your message inside.
- I used twine to cover the seam and wrap around the inside, then arrange your Berries and flowers. A little tag, Happy Birthday, and of course stickles for the center of flowers and Glossy Accents here and there. I used my Nuvo Glitter Gloss pen to add sparkle to the Berries and some leaves. And a couple of Red dots and called that done. Pretty inside and out too! What a fun project!
Hugs for crafty companies
Hugs to The Greetery (Thegreetery.com) for these adorable dies. I checked to see if they are available and turns out they are actually on sale. (Bonus!!) Here is a link for the Botanicuts Strawberries.
Tried and true Memento Inks can be purchased MANY places.
Other honorable mentions: Neena 80lb, 110lb and 80lb supersmooth (for copic coloring) are my go-to white card stocks.

If you have any questions just post them here and I’ll do my best to help you.
HUGS ALL AROUND!


I’d love to hear from you! ❤️